OctoPrint (or Octopi) plays a major role in my printing. Printing from SD Card and especially Micro-SD Card (the Ender 3) where it is easy to miss-insert makes operating from OctoPrint a no-brainer. But one Raspberry Pi for each printer doesn’t make sense. Multiple Printers can run on the same RPi but not Out-of-the-Box (OOB).
Multiple Printer Setup
The first step in running multiple printers on the same RPi is to be able to easily identify which printer is plugged in. Linux assigns names to the USB ports and you must modify the configuration to provide ‘friendly’ names.
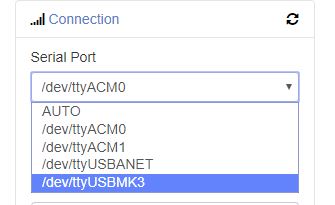
Start by plugging more than one printer into the RPi and identify the /dev/tty* for each printer. From OctoPrint you should see those names in the list and be able to select which one you wish to connect with.
Simply plug-in and run either printer. So how do you run more than one printer at a time? The short answer is, you don’t with just a single instance of OctoPrint running. You need to create additional instances for every printer you wish to run simultaneously.
Let me phrase it a little differently to make it clear. In this example I will plug in three printers. With three printers plugged in you can select any of them with the single instance.
Now I’ll jump ahead to having installed and configured everything for two instances of OctoPrint. Now I can connect with two different URLs to the two different instances. From either instance I can select any of the three printers. This means I can run any two of the three printers simultaneously.
Naming Conventions
With a basic understanding of the environment and how it is structured it is the time to define a clear naming convention. This will cover:
- USB Ports
- OctoPrint URLs
- [Webcam URLs]
Within these instructions I was able to get everything working. I started by identifying the ports via
- ls -al /dev/tty*
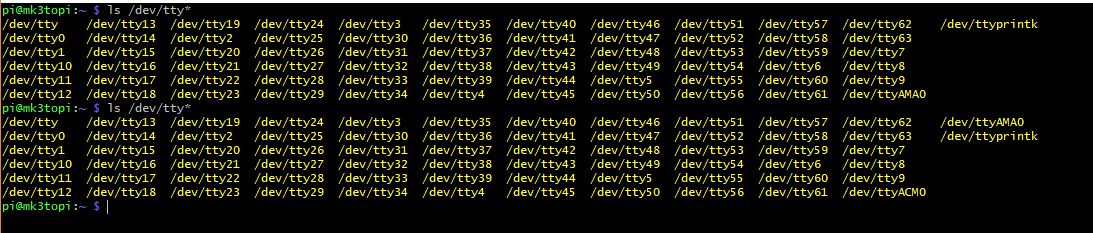
SSH into the RPi without any printers plugged in and then plug one printer in and execute it again to see the new port’s name. In my case it is ttyACM0
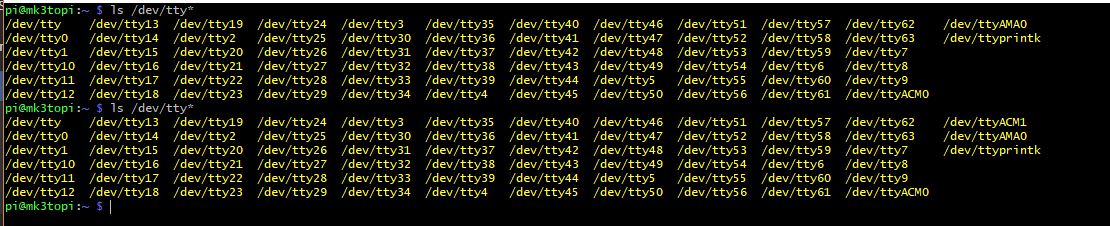
With the port identified I can plug in another printer and see it is ttyACM1. Now we can scan the attributes and find unique identifiers to define symbolic links.
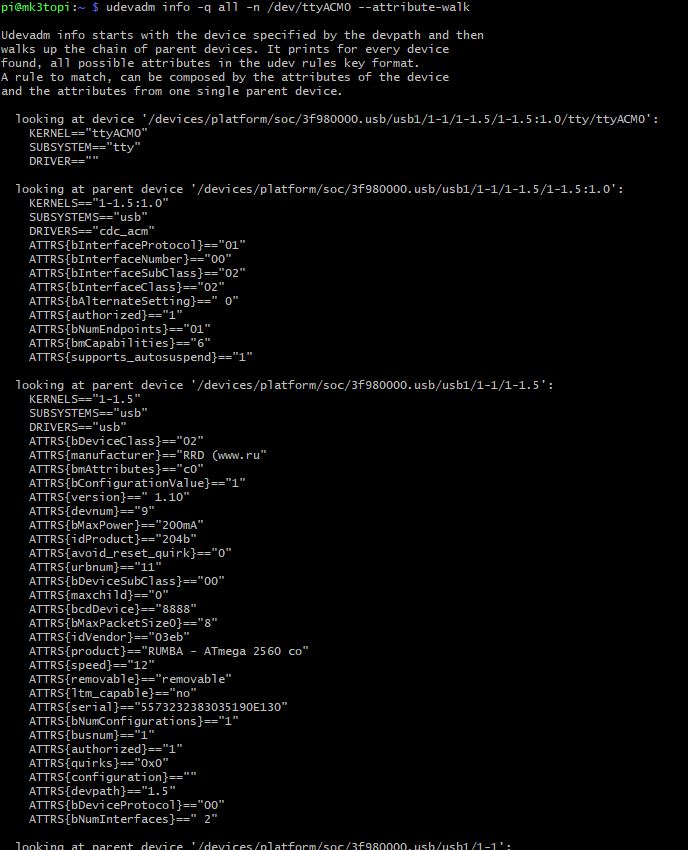
You can can for unique identifiers by running a difference in the captured lists from the two ports.
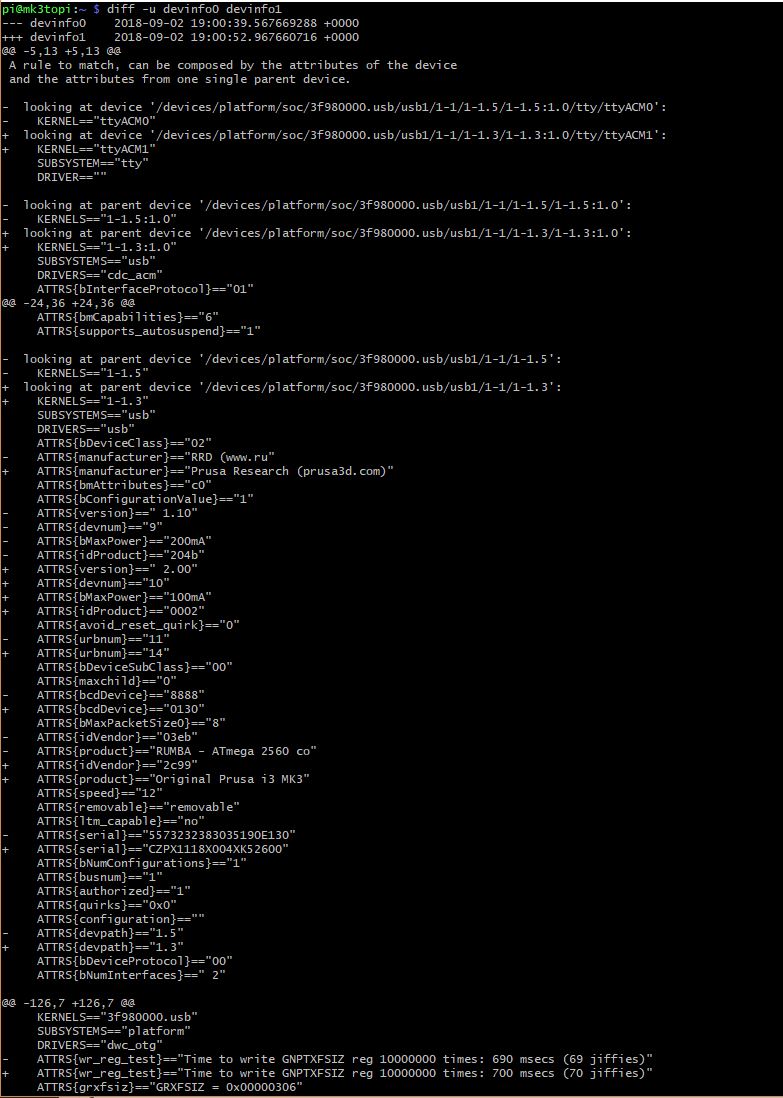
Following the instructions create and edit a 99-usb.rules file where you specify the values from your system. Based on this example the file is


Reboot and verify the ports have symbolic links as expected.

I prefaced the printer identifier with USB so it is possible to identify just the printer ports and using the -al switch on the ls command you can see what ports the symbolic links represent.
From OctoPrint you can select either port.
Now it is possible to easily identify the port with a friendly name.
Simultaneous Printing
Multiple Instances
In order to establish a second instance of OctoPrint we must:
- Copy OctoPrint directory into a second directory I’ll name OctoPrint2
- cp –R /home/pi/.octoprint /home/pi/.octoprint2
- Copy and modify OctoPrint2 config script
- sudo cp /etc/default/octoprint /etc/default/octoprint2
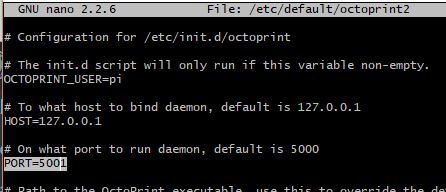
- sudo nano /etc/default/octoprint2
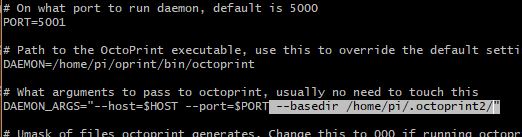
Change the Port and add a basedir to the DAEMON_ARGS
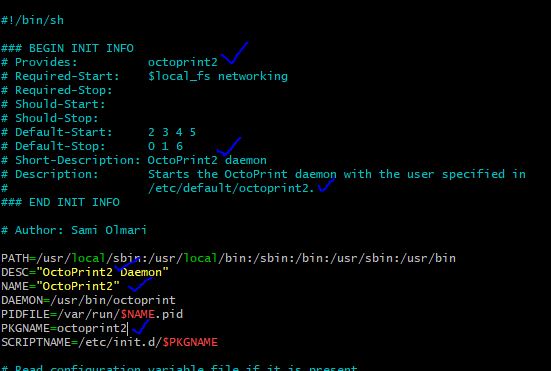
- Copy and modify OctoPrint2 init script. Run a find and replace ‘octoprint’ with ‘octoprint2’ except the ‘DAEMON’ which should remain octoprint.
![]()
- Add new OctoPrint2 init script to autostart
- sudo systemctl daemon–reload
- sudo update–rc.d octoprint2 defaults
- –> Check the service. The last statement will start the octoprint2 service on boot but you can check it without rebooting by manually starting the service.
- sudo /etc/init.d/octoprint2 start
- systemctl status octoprint2.service

HaProxy
NOTE: The linked instructions provide an example that confused me which is why I made this post, as a augmentation of that document.
The key difference in what I present and what is in the referenced post is:
- I reference the two instances using one for the default port, 5000, and the octoprint2 for the additional instance’s port, 5001 which matches my screen shots captured from setting up my second RPi.
- I only have one webcam and two RPi OctoPi servers which means one of them does not have a webcam and so the default page was an error page about not having a webcam, so I changed this to one of the instances.
Within the haproxy.cfg file there are sections. Changes start in the ‘frontend public’ section. The backend is selected based on the URL ‘path’. This is how the traffic is routed to the different instances, based on path. For example, if the original path was http://octopi.local and two printers are defined as described in this document, anet, and mk3 — http://octopi.local/anet/ points at the port 5000 instance and http://octopi.local/mk3/ points at the port 5001 instance.
Steps
To assure we can get back to the starting point make a backup copy of the haproxy.cfg file before making changes.
- sudo cp /etc/haproxy/haproxy.cfg /etc/haproxy/haproxy.old
Within the /etc/haproxy/haproxy.cfg file with sections ‘global’, ‘defaults’, ‘frontend public’, ‘backend octoprint’, and ‘backend webcam’.
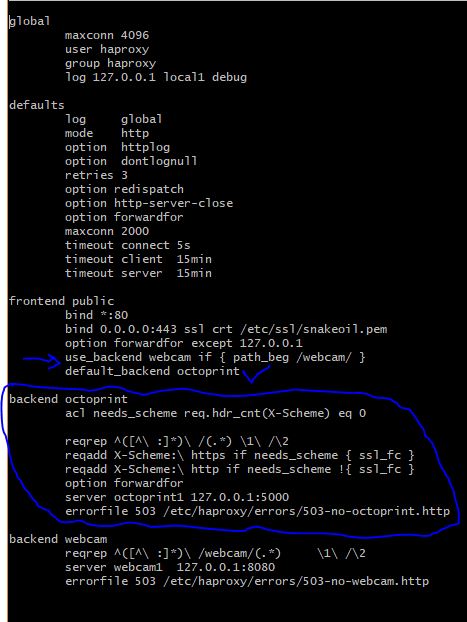
Replace the ‘backend octoprint’ with sections to the active instances you created. A critical difference is the additions of ‘reqadd X-Script-Name:’ to the all the ‘backend’ sections except ‘backend webcam’.
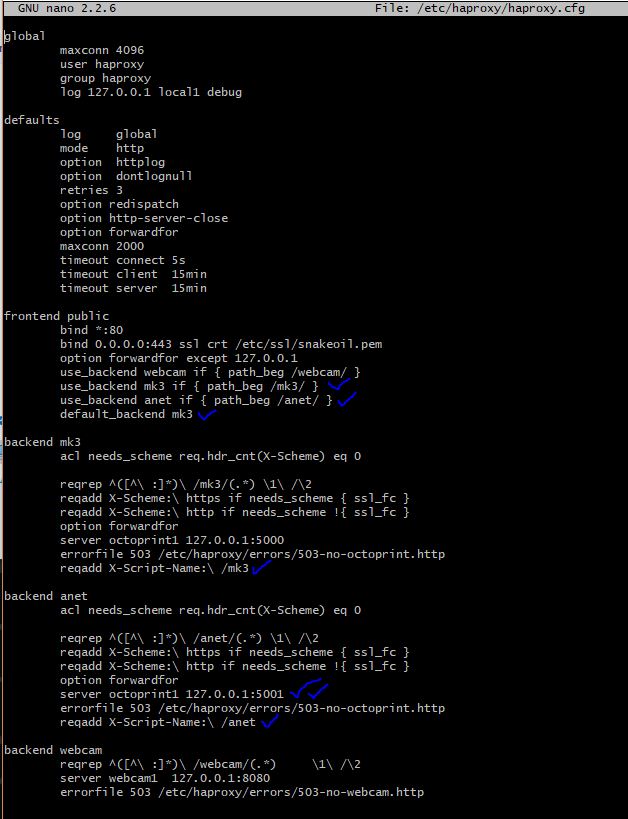
It is interesting to note that the server is octoprint1 and you specify the access by port rather than any reference to octoprint2, which is directory pointed to as part of the octopi instance setup.
Multiple Webcams
Since I only have one camera at the moment I can only refer to the referenced link.
Summary
A very long post. I don’t know that I have all the details perfect but I captured what I could and don’t have another RPi to setup. This is my notes for when I have need to setup another RPi.